MEDM uses font aliases so that a user can choose a set of fonts that suits his purposes without changing MEDM. The disadvantage of this approach is that these font aliases must be installed. There are two ways to do this: using a font server and installing the font aliases locally.
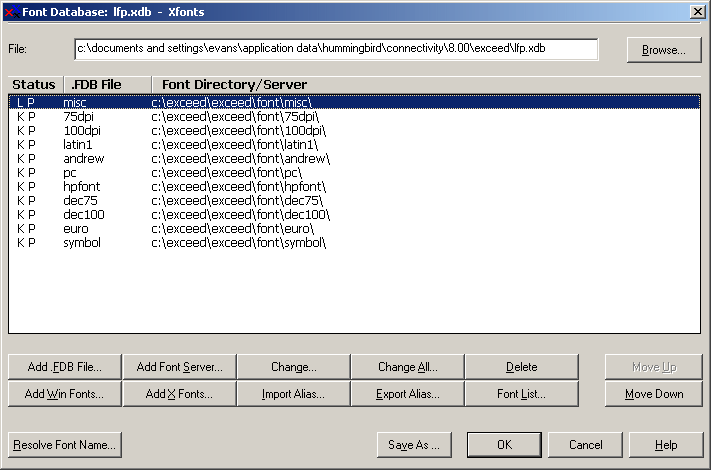
In both cases you go to the Xconfig utility for Exceed (Version 8 or later) and then go to Font Management. In the Font Management dialog choose Edit. You should see a screen that looks like this:

This is the easiest approach, but only works if you have a font server available. In the above screen choose Add Font Server. In that screen fill out the parameters for your server. The ones shown are for the APS.

To install the fonts locally, first download medmfonts.ali by right clicking medmfonts.ali and selecting save target (or however your browser saves a target). Then choose Import Alias in the screen above. In the resulting dialog, for the From: textbox, browse to the directory to where you downloaded medmfonts.ali and choose medmfonts.ali. For the To: textbox, choose (All Directories). This will cause Exceed to search all font directories for the the actual fonts. (Both the misc and 100 dpi directories will be used.) Click import and continue.

If you are curious, you can see where the fonts got installed. In the first screen above double click the line for misc or for 100dpi. The aliases have names like widgetdm_nn and are scattered. You can also remove them there.