Before starting a new project, you need a version of EPICS base for your system. It may be useful to look at the tutorial on Using CVS to Check Out and Build Base first. This tutorial will assume you already have base installed and built and that CDT is set up properly.
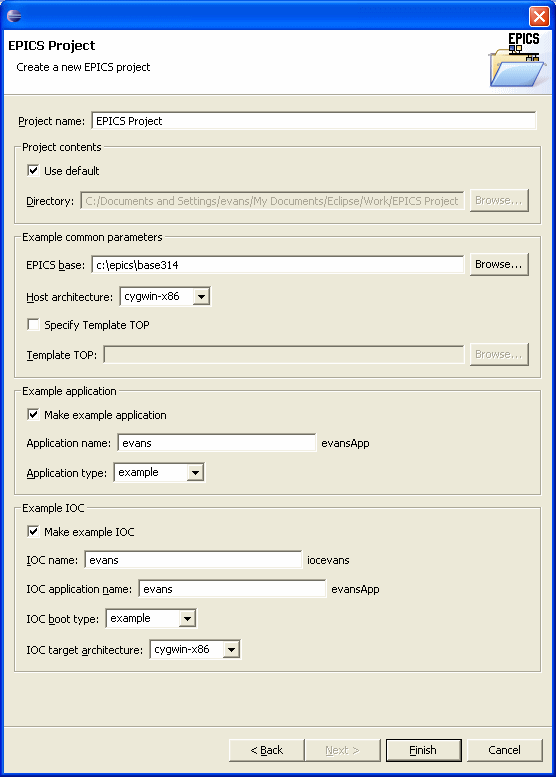
To start a new EPICS project, go to the Eclipse File menu, and select New | Project | EPICS | EPICS Project. You should see a dialog like this:
Enter the properties for the project you want to create. In this case we used "EPICS Demo Project" for the Project name, and checked Make example application and Make example IOC to get an example application and an example IOC. We specified a valid EPICS base, and chose a Host architecture from the choices available. The available choices are the architectures that have been built in this base. We choose ""example" for both the Application type and the IOC boot type. This is a good place to start. We entered "demo" for the Application name, which means a directory demoApp will be created. We entered "demo1" for the IOC name, which will make iocdemo1. The Application name and the IOC application name should be the same for starters, whatever you choose, unless you are knowledgeable enough to be managing more than one application. When everything is OK, click Finish.
You should see your project in the Navigator or C/C++ Project views.
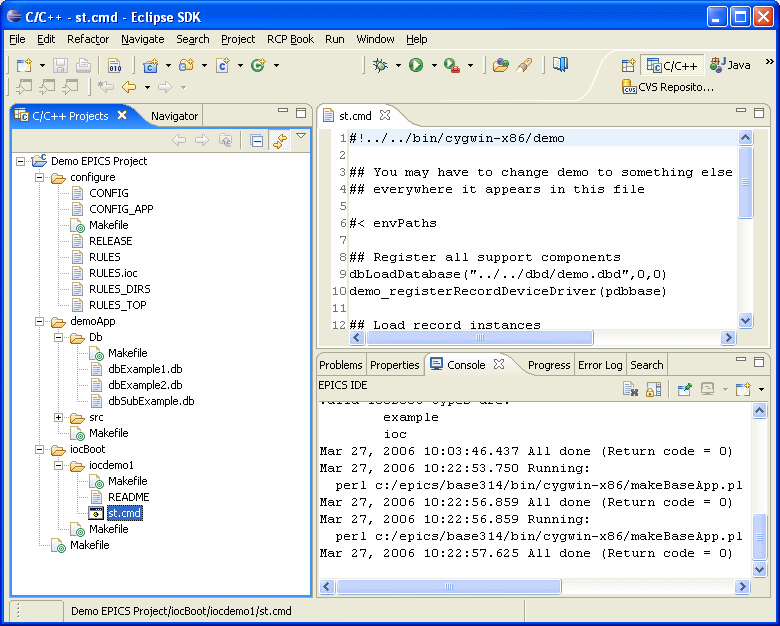
The output from the calls to MakeBaseApp is shown in the Console. This may be useful if there were problems. You may have to open the Console or change which console is shown. The one you want is named EPICS IDE. You change consoles via the buttons on the Console toolbar.