This tutorial shows how to go about checking out base from CVS. The steps may be different for your version of CVS, but this should provide a guide and perhaps help point out some of the pitfalls. It is assumed you have CDT set up as described in C/C++ Setup. If you do not, then you should do that first. Second, you should read the page on CVS Setup in the Getting Started section. It has information that will help you set up CVS in Eclipse for EPICS before doing this tutorial.
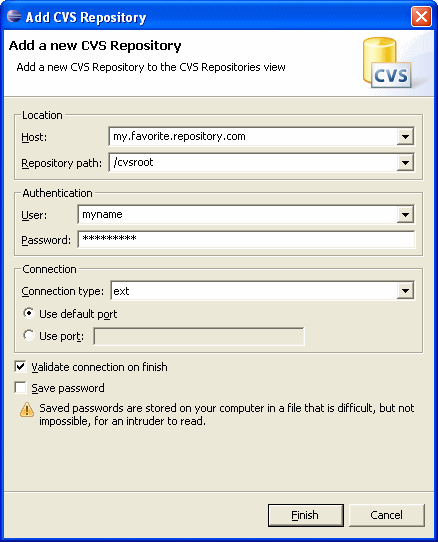
Change to the Eclipse CVS Repository Exploring Perspective. You can do this via Window | Open Perspective. First, you need to add a new CVS repository, if the one you need is not there. Right click in the CVS Repositories View and select New | Repository Location.

Unless you have reasons to do differently, it is advised to use "ext" as the Connection type, as described in CVS Setup. It is advisable to not save the password, unless it is a public site. After clicking Finish, you may get dialogs having to do with connecting to the repository, SSH, etc. It is beyond the scope of this tutorial to help you here. If things are set up properly, you will end up with the repository listed in the CVS Repositories View. Otherwise, you will have to find out how to properly connect to the repository.
The next step is to check out base from the respository you just created or which was already there. Before doing that is is advisable to turn off Project | Build Automatically. This is the suggested default for C/C++ projects (but not for Java projects, where you would probably prefer it on). It will save you waiting around and possibly having Eclipse deadlock until you have things set up properly. Unless you are working on base, not just using it, there is little reason to have it build automatically. You should also have the C/C++ Indexer disabled as described in CVS Setup unless you have some good reason not to.
In the CVS Repositories View expand Versions | base and select which version you want.
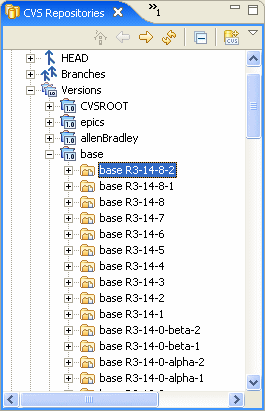
Right click on the version and select Check Out As�. There may be some more messages about connecting to the server, but you should eventually get this dialog.
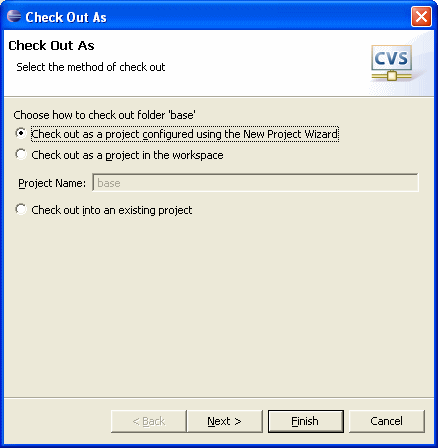
Use Check out as a project configured using the New Project Wizard and click Next.
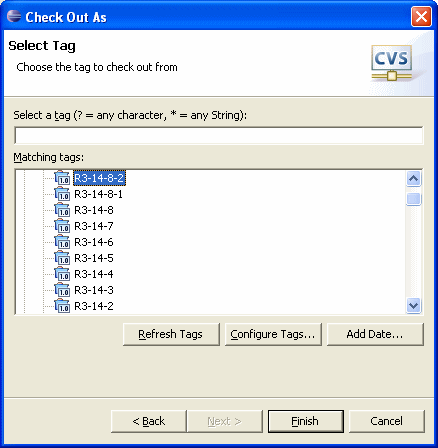
The version you originally selected should be highlighted. If not, pick a version and click Finish. If no tags appear, you will have to experiment with the buttons and other configuration. You should now see the New Project wizard.
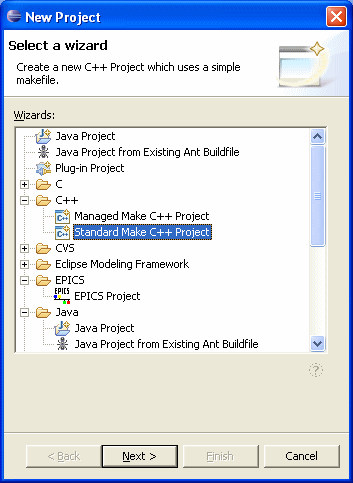
Select a Standard Make C++ Project. This is the kind of project that just runs Make and is what is appropriate for EPICS base. You do not want a managed make project, here. Click Next.
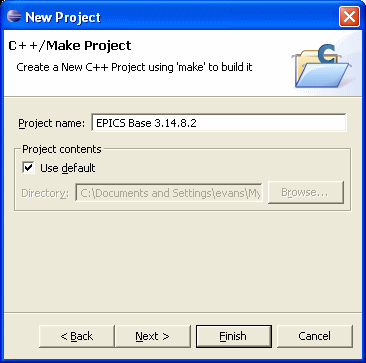
Enter a name for your project. If you want the project in your default Eclipse workspace, check Use default if it is not already checked. Since base is rather big, you may want to put it in another place in your file system. In this case, specify a Directory. Then click Finish. Eclipse should then check out the base you specified into the project you specified, looking like this until it is done:
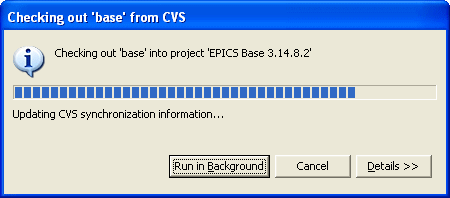
Unless you select Run in Background, Eclipse will be tied up until it finishes. When Eclipse is done, you should have a new project.
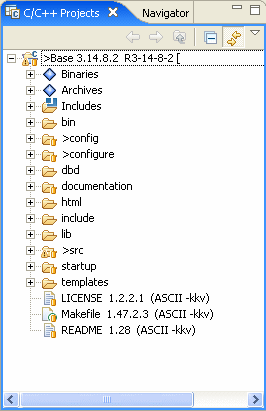
Right click on the project and select Properties | C/C++ Indexer. It should be marked as No Indexer. Otherwise it probably took a long time to get here. Go to C/C++ Make Project.
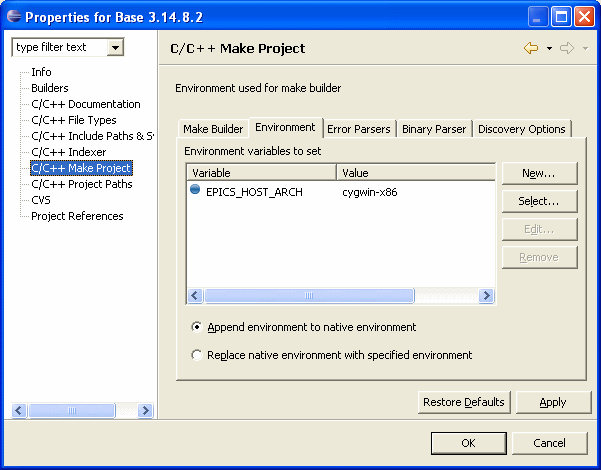
In the Environment tab HOST_ARCH should be defined to be your host architecture. If you are using a 3.14 base, this variable could be EPICS_HOST_ARCH, but HOST_ARCH will work for both 3.13 and 3.14 (provided only one is defined). You might want to define this as a preference for C/C++ Make Project under Window | Preferences. Then you won't have to change it every time. Other settings for a C/C++ Make Project are up to you. The defaults tend to be OK, unless mentioned here or in the C/C++ Setup topic.
If you are using a platform, such as Linux or Solaris, that needs LD_LIBRARY_PATH set, then you can set that on this tab also. The directory for LD_LIBRARY_PATH is where the shared object libraries from base are located. It should be <your_base>/bin/<host_arch>, where your_base is the location of the base you want to use, and host_arch is the same as you set for HOST_ARCH. Whether you choose Append environment to native environment or Replace native environment with specified environment the LD_LIBRARY_PATH specified here will override anything that was set elsewhere. If you need other things in the LD_LIBRARY_PATH, then you need to include them all here. The same applies to PATH if you set it here.
Finally, be sure the Console View is showing. You won't (easily) be able to make it appear after the build starts. Right click on the project in the C/C++ Projects View and select Build Project or Rebuild Project. (Depending on how CDT feels about the state of your project, Build Project may not do anything.) The project should build, and you will see the build results in the Console.
If there are problems, remember that in spite of the pretty interface, CDT is just running Make for you. If it doesn't build, then you will have to figure out the problems the same way as you would outside of Eclipse.