![[TOC]](gif/back.gif)
![[TOC]](gif/back.gif)
 Command Syntax
This program can only accept the image data in XDR format. Each XDR image file consists of an array of 2D image data, and a list of six numbers: [Xmin, Xmax, Ymin, Ymax, Vmin, Vmax] which define the geometric and value ranges of the 2D image.
The XDR file can be directly generated by any one of the image2d, plot2d, view2d, vw2d tools (Ref 1). For any 8 bit tiff image or 2D ASCII image data, the image processor img (Ref 2) can also be used to save the XDR image file through using the data ranges input dialog.
This program allows the user to have flexible controls on the pixel size and the color table used. A user may have to try different color table, backgrand and foregrand color number to reach a desirable result. On WIN device, there may be some problem with automatical color table refreshing and a user may have to use control button to force the image redrawing.
source /usr/local/rsi/idl_5.5/bin/idl_setupIn order to access IDL programs installed in the local epics/extensions/bin, a user has to make sure that the following two environment variables are set before invoking IDL :
         setenv EPICS_EXTENSIONS /usr/local/epics/extensions
         setenv IDL_STARTUP $EPICS_EXTENSIONS/bin/$HOST_ARCH/viewer_startup.pro
and make sure the directory /usr/local/epics/extensions/bin/$HOST_ARCH is
in his/her IDL search path.
imgThis commnad will automatically load the image.pro, scan2d_overlay.pro into an IDL session. From the "Tools" menu of the menu bar, select the "Overlay2DImages..." item, then the IMAGE_OVERLAY program pops up.
To access the IMAGE_OVERLAY program from the IDL prompt within the idl session just enter the following command at the IDL prompt:
	IDL> .run PS_open
	IDL> .run scan2d_overlay
	IDL> scan2d_overlay,path='xdr/directory'  [,Group=group]

	Open...
	Re-Run Overlay...
	Close
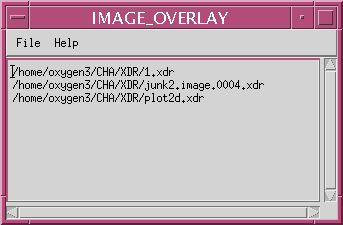
The 'Open...' item let user select multiple XDR image files from a directory, then all the selected images will be loaded into image_overlay program, first calcultate the common geometric dimension shared by these files, then the new image_array based on same geometry is constructed, and then the overlay program pops up with this new constructed image_array.
The 'Re-run Overlay...' item let the user re-invoke the image_overlay program manually with the loaded XDR files.
The 'Close' item closes the image_overlay program.
	LMB       - select only the picked file
	CNTL-LMB  - add the picked file to the selection list
	Shift-LMB - add all the files between the last two click files
The 'Ok' or 'Open' button accept all the files selected and close the file selection dialog.
	Help...
	xdrFile...
The 'Help...' item gives the info about image_overlay program.
The 'xdrFile...' item gives the infomation about the XDR files been loaded, it includes filename, image dimensions, X, Y, and Value ranges for each file loaded in.

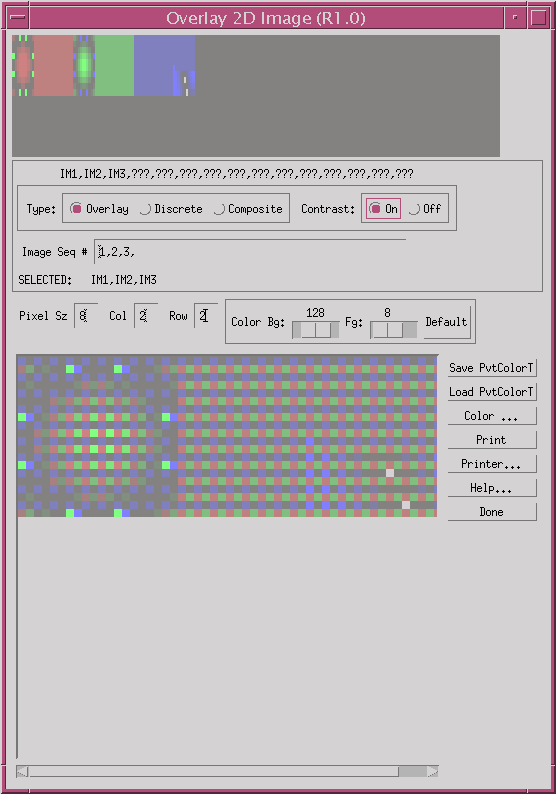
Therefore the first image loaded in always use red shaded color, the second image loaded in always use the green shaded color, the third image loaded in always use the blue shaded color, etc...
Below the pan image area there is a label string shows the number of images loaded into the program. For example, 'IM1,IM2,IM3,???,???,...' indicates currently only 3 images are loaded into the scan2d_overlay program.
Overlay Type - The Overlay Image with displayed with composite mesh (pixel). Each mesh is composed by one pixel from each image, for 2 by 2 composite it can hold 4 images without overlap, for 4 by 4 composite it can hold 16 images without overlap. If it is not filled with exact number of images, the missing location will be shaded.
Discrete Type - The discrete images are drawn separately in the drawing area with user adjustable pixel size.
Composite Type - The composite image is a mathematical superposition of all the images togather with user adjustable pixel size. This is the default setting.
Color Contrast Widget : On/Off
On - Default option, the color contrast is desired, the lowest value will be displayed with the largest color from the next image sub-color table.
Off - Color contrast is not desired, then the lowest value of the image will be displayed with the lowset shaded color from the same sub-color table.
Image Seq # Widget :
A sublist of image sequential numbers from the loaded in images list. The sequential number must be comma separated. This provide the further control of filtering out undesired images for overlaying.
Below this field thres is a text label verify the actual list of images selected for overlay plot.
Pixel Sz : This speicify the magnification factor of the pixel size used in the overlay drawing area. Increase the number of pixel size will increase the resultant overlay image area.
Col : This specify the number of columns used in a composite mesh pixel in overlay mode. For image sub-list less than 5, this should set to 2.
Row : This specify the number of rows used in a composite mesh pixel in overlay mode. For image sub-list less than 5, this should set to 2.
Color Bg Slider Bar: This controls the shaded background color for the sub-color tables.
Fg Slider Bar: This controls the number of colors used for defining sub-color tables.
Default Button: Reset to original default 16 sub-color tables. It resets the Fg Sliger Bar to 8 and Bg Slider Bar to 128.
Save PvtColorT - This button save the current color table as private sub-color tables.
Load PvtColorT - This button load the private color table into the overlay program.
Color... - This button pops up the XLOADCT program which allows the user to load any IDL color tables.
Print - This button dumps the overlay image to PS plotter.
Printer... - This button pops up the PS plotter setup dialog.
Help... - This button shows the help page about overlay program.
Done - This button exit this program.